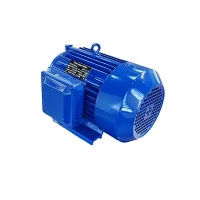
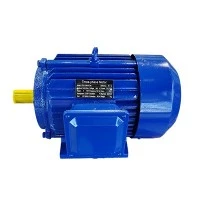
Aligning a NEMA rated motor is a crucial process that directly impacts the performance, efficiency, and lifespan of the motor and the equipment it drives. As a supplier of NEMA rated motors, I have witnessed firsthand the importance of proper alignment and the issues that can arise when it is not done correctly. In this blog post, I will share my insights on how to align a NEMA rated motor effectively.
Understanding NEMA Rated Motors
Before delving into the alignment process, it's essential to understand what NEMA rated motors are. The National Electrical Manufacturers Association (NEMA) sets standards for motors in North America. NEMA rated motors are designed and manufactured to meet these standards, ensuring compatibility, reliability, and performance. There are different types of NEMA rated motors, such as NEMA AC Motor, NEMA Premium Efficient Motor, and NEMA Electric Motor. These motors are widely used in various industrial and commercial applications, from pumps and fans to conveyors and compressors.
Importance of Motor Alignment
Proper motor alignment is critical for several reasons. Firstly, it reduces vibration and noise. Misaligned motors can cause excessive vibration, which not only leads to increased wear and tear on the motor and connected equipment but also generates noise. This can be a significant issue in work environments where noise levels need to be kept to a minimum.
Secondly, alignment improves energy efficiency. When a motor is misaligned, it has to work harder to transfer power to the driven equipment. This results in increased energy consumption and higher operating costs. By ensuring proper alignment, you can optimize the motor's performance and reduce energy waste.
Finally, correct alignment extends the lifespan of the motor and other components. Misalignment can cause premature failure of bearings, couplings, and shafts, leading to costly repairs and downtime. By aligning the motor correctly, you can prevent these issues and ensure the long-term reliability of your equipment.
Tools Required for Motor Alignment
To align a NEMA rated motor, you will need the following tools:
- Dial Indicators: These are used to measure the offset and angular misalignment between the motor and the driven equipment. Dial indicators provide accurate readings and are essential for precise alignment.
- Straightedges: A straightedge is used to check the parallelism of the motor and the driven equipment. It helps to ensure that the shafts are in line and that there is no significant angular misalignment.
- Shims: Shims are thin pieces of metal or plastic that are used to adjust the height of the motor. They are placed under the motor feet to correct vertical misalignment.
- Alignment Laser System: This is a more advanced tool that uses lasers to measure and align the motor. Alignment laser systems are highly accurate and can significantly reduce the time and effort required for alignment.
Step-by-Step Motor Alignment Process
The following is a step-by-step guide on how to align a NEMA rated motor:
Step 1: Preparation
- Clean the Mounting Surfaces: Before starting the alignment process, make sure that the mounting surfaces of the motor and the driven equipment are clean and free of debris. Any dirt or debris can affect the accuracy of the alignment.
- Check the Coupling: Inspect the coupling between the motor and the driven equipment for any signs of damage or wear. Replace the coupling if necessary.
- Loosen the Motor Mounting Bolts: Loosen the bolts that secure the motor to its mounting base. This will allow you to adjust the position of the motor during the alignment process.
Step 2: Rough Alignment
- Use a Straightedge: Place a straightedge across the motor and the driven equipment shafts. Check for any obvious misalignment and make rough adjustments to the motor position using a pry bar or other suitable tool.
- Check the Parallelism: Ensure that the motor and the driven equipment are parallel to each other. You can use a level or a straightedge to check the parallelism.
Step 3: Precise Alignment
- Install Dial Indicators: Mount the dial indicators on the motor and the driven equipment shafts. Make sure that the indicators are properly calibrated and that the measuring tips are in contact with the shafts.
- Take Readings: Rotate the shafts together and take readings from the dial indicators at different positions. This will help you to determine the amount of offset and angular misalignment between the motor and the driven equipment.
- Make Adjustments: Based on the readings, make adjustments to the motor position using shims and bolts. Add or remove shims under the motor feet to correct vertical misalignment, and use the bolts to adjust the horizontal position of the motor.
- Recheck the Alignment: After making adjustments, recheck the alignment using the dial indicators. Continue to make adjustments until the alignment is within the acceptable tolerance.
Step 4: Final Checks
- Tighten the Mounting Bolts: Once the alignment is correct, tighten the bolts that secure the motor to its mounting base. Make sure that the bolts are tightened to the specified torque.
- Check the Coupling Alignment: Recheck the alignment of the coupling between the motor and the driven equipment. Ensure that the coupling is properly installed and that there is no excessive play or misalignment.
- Run the Motor: Start the motor and observe its operation. Check for any abnormal vibration or noise. If you notice any issues, stop the motor immediately and recheck the alignment.
Common Alignment Errors and How to Avoid Them
One of the most common alignment errors is not using the correct tools or techniques. As mentioned earlier, using the right tools, such as dial indicators and alignment laser systems, is essential for accurate alignment. Make sure that you are familiar with the proper use of these tools and follow the manufacturer's instructions.
Another common error is not taking into account thermal expansion. Motors can expand or contract as they heat up or cool down, which can affect the alignment. When aligning a motor, it's important to consider the operating temperature and make any necessary adjustments to account for thermal expansion.
Finally, not performing regular alignment checks can also lead to problems. Over time, the alignment of a motor can shift due to vibration, wear, or other factors. It's recommended to perform regular alignment checks and make adjustments as needed to ensure the continued performance and reliability of your equipment.
Conclusion
Aligning a NEMA rated motor is a critical process that requires attention to detail and the use of the right tools and techniques. By following the steps outlined in this blog post, you can ensure that your motor is properly aligned, which will improve its performance, efficiency, and lifespan.
As a supplier of NEMA rated motors, I am committed to providing high-quality products and support to our customers. If you have any questions about motor alignment or need assistance with selecting the right motor for your application, please feel free to contact us. We are here to help you make the most of your motor investment and ensure the smooth operation of your equipment.


References
- National Electrical Manufacturers Association (NEMA) Standards Publications
- Motor Alignment Best Practices Guides from Industry Associations
- Manufacturer's Manuals for Dial Indicators, Alignment Laser Systems, and NEMA Rated Motors