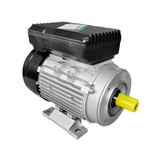
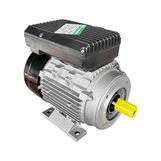
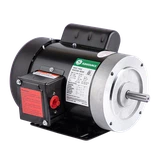
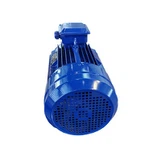
Hey there! As a supplier of three-phase AC motors, I often get asked about how to replace the bearings of these motors. It's a crucial maintenance task that can extend the life of your motor and keep it running smoothly. In this blog, I'll walk you through the process step by step.
Why Replace the Bearings?
Before we dive into the replacement process, let's talk about why you might need to replace the bearings in the first place. Bearings in a Three Phase AC Motor are responsible for supporting the rotating shaft and reducing friction. Over time, due to factors like normal wear and tear, high temperatures, and contamination, the bearings can start to fail. Signs of bearing failure include unusual noises, increased vibration, and overheating. If you notice any of these symptoms, it's time to replace the bearings.
Tools and Materials You'll Need
- Socket and wrench set: To remove and install bolts and nuts.
- Bearing puller: This tool is essential for safely removing the old bearings.
- Hammer and drift punches: For gently tapping and aligning parts.
- New bearings: Make sure to get the correct size and type for your motor. You can find a wide range of AC Three Phase Induction Motor bearings that are compatible with different models.
- Grease: High-quality bearing grease to lubricate the new bearings.
- Clean rags and solvent: To clean the motor housing and shaft.
Step-by-Step Guide to Replacing the Bearings
Step 1: Safety First
Before you start working on the motor, make sure it's completely powered off and disconnected from the electrical supply. This will prevent any electrical shocks or accidents. Also, wear appropriate safety gear, such as gloves and safety glasses.
Step 2: Remove the Motor Covers
Use your socket and wrench set to remove the bolts holding the motor covers in place. Carefully lift off the covers and set them aside. This will give you access to the motor's internal components.
Step 3: Locate the Bearings
The bearings are usually located at both ends of the motor shaft. They are held in place by bearing caps or retaining rings. Take a close look at how the bearings are installed so you can remember how to put the new ones in correctly.
Step 4: Remove the Old Bearings
This is where the bearing puller comes in handy. Attach the puller to the old bearing and tighten it securely. Then, use the puller to slowly and evenly pull the bearing off the shaft. Be careful not to damage the shaft or the motor housing during this process. If the bearing is stuck, you can use a hammer and drift punches to gently tap it loose.


Step 5: Clean the Shaft and Housing
Once the old bearings are removed, use a clean rag and solvent to clean the motor shaft and housing. Make sure to remove any dirt, grease, or debris. This will ensure a proper fit for the new bearings.
Step 6: Install the New Bearings
Apply a thin layer of grease to the inside of the new bearings. Then, carefully slide the bearings onto the shaft. Make sure they are properly aligned and seated. You may need to use a hammer and drift punches to gently tap the bearings into place.
Step 7: Reinstall the Bearing Caps or Retaining Rings
Put the bearing caps or retaining rings back in place and tighten the bolts or nuts. Make sure they are tightened evenly to prevent any misalignment.
Step 8: Reassemble the Motor
Once the new bearings are installed, it's time to reassemble the motor. Put the motor covers back on and tighten the bolts. Double-check that all the components are properly installed and secured.
Step 9: Lubricate the Bearings
Apply a small amount of grease to the bearings through the grease fittings. This will help to reduce friction and extend the life of the bearings.
Step 10: Test the Motor
After reassembling the motor, reconnect it to the electrical supply and test it. Listen for any unusual noises or vibrations. If everything sounds and feels normal, then you've successfully replaced the bearings.
Tips and Tricks
- Take your time: Replacing the bearings is a delicate process, so don't rush it. Make sure you follow each step carefully to avoid any mistakes.
- Keep track of the parts: As you remove the parts, keep them organized and labeled. This will make it easier to put everything back together correctly.
- Use the right tools: Using the correct tools is essential for a successful bearing replacement. Don't try to use makeshift tools, as they can damage the motor or the bearings.
- Get professional help if needed: If you're not confident in your ability to replace the bearings, it's best to get professional help. A qualified technician can ensure that the job is done correctly and safely.
Conclusion
Replacing the bearings of a Alternating Current AC Motor is a challenging but rewarding task. By following the steps outlined in this blog, you can save money on repairs and keep your motor running smoothly for years to come. If you have any questions or need help finding the right bearings for your motor, don't hesitate to contact us. We're here to help you with all your three-phase AC motor needs. Whether you're looking for a new motor or just need some maintenance advice, we've got you covered. So, get in touch with us today and let's start a conversation about your motor requirements.
References
- "Motor Maintenance and Troubleshooting" by John Doe
- "Three-Phase AC Motors: Principles and Applications" by Jane Smith