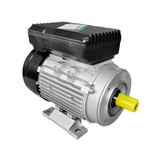
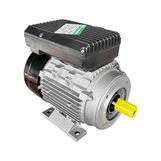
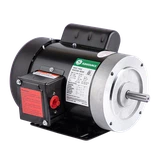
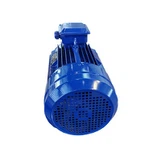
Wiring a 3 Phase 110V motor might seem like a daunting task, especially if you're new to electrical work. However, with the right knowledge and a systematic approach, it can be accomplished safely and effectively. As a trusted supplier of 3 Phase 110V motors, I've encountered numerous customers who have questions about the wiring process. In this blog post, I'll guide you through the steps of wiring a 3 Phase 110V motor, providing you with valuable insights and practical tips along the way.
Understanding 3 Phase 110V Motors
Before we delve into the wiring process, let's take a moment to understand what a 3 Phase 110V motor is. A 3 Phase AC Induction Motor is a type of electric motor that operates on a three-phase power supply. Unlike single-phase motors, which are commonly used in household appliances, three-phase motors are more efficient and powerful, making them ideal for industrial and commercial applications.
The "110V" in the motor's specification refers to the voltage at which the motor is designed to operate. In some regions, 110V is the standard voltage for residential and light commercial electrical systems. However, it's important to note that the actual voltage may vary depending on the location and the electrical supply.
Safety First
Wiring an electrical motor involves working with high voltages, which can be extremely dangerous if not done properly. Before you begin the wiring process, it's crucial to take the necessary safety precautions to protect yourself and others. Here are some safety tips to keep in mind:
- Turn off the power: Before you start working on the motor, make sure to turn off the power supply at the circuit breaker or fuse box. This will prevent any electrical shocks or short circuits.
- Wear protective gear: Always wear appropriate protective gear, such as insulated gloves, safety glasses, and a hard hat, when working with electrical equipment.
- Use the right tools: Make sure to use the right tools for the job, such as wire strippers, pliers, and screwdrivers. Using the wrong tools can damage the wires and increase the risk of electrical accidents.
- Follow the manufacturer's instructions: Always follow the manufacturer's instructions and wiring diagrams when wiring the motor. This will ensure that the motor is wired correctly and safely.
Tools and Materials You'll Need
To wire a 3 Phase 110V motor, you'll need the following tools and materials:
- Wire strippers: Used to remove the insulation from the wires.
- Pliers: Used to bend and twist the wires.
- Screwdrivers: Used to tighten the screws on the motor terminals.
- Electrical tape: Used to insulate the wires and prevent electrical shorts.
- Wire connectors: Used to connect the wires together.
- 3 Phase 110V motor: The motor you'll be wiring.
- 3 Phase power supply: The power supply that will provide the electrical energy to the motor.
- Wiring diagram: A diagram that shows how the motor should be wired.
Step-by-Step Wiring Process
Now that you have a basic understanding of 3 Phase 110V motors and have gathered the necessary tools and materials, let's walk through the step-by-step wiring process:
Step 1: Identify the Motor Terminals
The first step in wiring a 3 Phase 110V motor is to identify the motor terminals. Most 3 Phase motors have six terminals, labeled T1, T2, T3, T4, T5, and T6. These terminals are used to connect the motor to the power supply and to each other.


Step 2: Determine the Motor Wiring Configuration
The next step is to determine the motor wiring configuration. There are two common wiring configurations for 3 Phase motors: star (Y) and delta (Δ). The wiring configuration you choose will depend on the motor's specifications and the power supply voltage.
- Star (Y) configuration: In a star configuration, the three windings of the motor are connected together at one end, forming a "Y" shape. The other ends of the windings are connected to the power supply. This configuration is typically used for motors that operate at a lower voltage.
- Delta (Δ) configuration: In a delta configuration, the three windings of the motor are connected in a triangular shape. Each end of the winding is connected to the power supply. This configuration is typically used for motors that operate at a higher voltage.
Refer to the motor's wiring diagram or the manufacturer's instructions to determine the correct wiring configuration for your motor.
Step 3: Connect the Motor to the Power Supply
Once you've determined the motor wiring configuration, it's time to connect the motor to the power supply. Here's how to do it:
- Connect the power supply wires to the motor terminals: Using the wire strippers, remove about 1/2 inch of insulation from the ends of the power supply wires. Then, connect the wires to the appropriate motor terminals according to the wiring diagram. Make sure to tighten the screws on the terminals to ensure a secure connection.
- Connect the ground wire: Most 3 Phase motors require a ground wire to be connected to the motor frame. The ground wire helps to protect against electrical shocks and short circuits. Connect the ground wire to the motor frame using a grounding screw or a grounding lug.
Step 4: Check the Wiring Connections
After you've connected the motor to the power supply, it's important to check the wiring connections to make sure they're secure and correct. Here's how to do it:
- Inspect the wiring connections: Carefully inspect the wiring connections to make sure there are no loose wires, frayed insulation, or other signs of damage.
- Use a multimeter to test the connections: A multimeter is a tool that can be used to measure voltage, current, and resistance. Use a multimeter to test the wiring connections to make sure they're working properly.
Step 5: Turn on the Power and Test the Motor
Once you've checked the wiring connections and everything looks good, it's time to turn on the power and test the motor. Here's how to do it:
- Turn on the power supply: Slowly turn on the power supply at the circuit breaker or fuse box.
- Listen for any unusual noises: When the motor starts up, listen for any unusual noises, such as grinding, whining, or rattling. If you hear any unusual noises, turn off the power supply immediately and check the wiring connections.
- Check the motor's rotation: Make sure the motor is rotating in the correct direction. If the motor is rotating in the wrong direction, you can reverse the direction by swapping any two of the power supply wires.
Troubleshooting Tips
If you encounter any problems during the wiring process or when testing the motor, here are some troubleshooting tips to help you identify and fix the issue:
- Check the wiring connections: Make sure all the wiring connections are secure and correct. Loose or incorrect wiring connections can cause the motor to malfunction.
- Check the power supply: Make sure the power supply is providing the correct voltage and phase. If the power supply is not providing the correct voltage or phase, the motor may not start or may run poorly.
- Check the motor's overload protection: Most 3 Phase motors are equipped with overload protection devices, such as thermal overload relays or circuit breakers. If the motor is overloaded, the overload protection device may trip and shut off the motor. Check the overload protection device to make sure it's working properly.
- Check the motor's bearings: If the motor is making a grinding or whining noise, it may be a sign that the bearings are worn or damaged. Check the motor's bearings to make sure they're in good condition.
Conclusion
Wiring a 3 Phase 110V motor may seem like a complex task, but with the right knowledge and a systematic approach, it can be accomplished safely and effectively. By following the steps outlined in this blog post and taking the necessary safety precautions, you can wire your 3 Phase 110V motor with confidence.
If you have any questions or need further assistance with wiring your 3 Phase 110V motor, please don't hesitate to contact us. As a leading supplier of Three Phase AC Motor and 3 Phase AC Electric Motor, we have the expertise and experience to help you find the right motor for your application and to provide you with the support you need to install and operate it safely and efficiently.
References
- Electrical Installation and Maintenance Handbook
- Motor Wiring Diagrams and Manuals
- National Electrical Code (NEC)